Popular Now


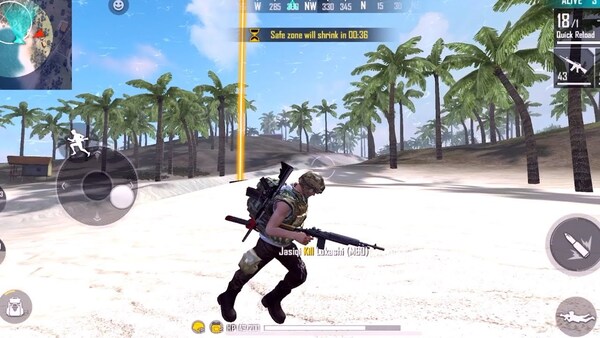
Garena Free Fire has become one of the most popular mobile battle royale games globally. With short matches, fast-paced gameplay, and unique mechanics, it provides an engaging yet competitive environment for both beginners and experienced players. While winning a match may appear simple at first glance, mastering the game requires a deep understanding of its features — from landing strategies and character skills to weapon choices and late-game positioning.
This comprehensive 2000+ word guide will help you become a skilled Free Fire player by exploring every important aspect of the game in a structured, time-based, and meaning-focused manner. Whether you're just landing or fighting in the final zone, this guide will show you how to dominate.
How to Choose the Right Character and Skills
Understanding Character Abilities
Free Fire stands out from other battle royale games with its unique character system. Each character has a special ability that can significantly influence your playstyle. For example, Alok offers healing and speed boosts, while Chrono provides a temporary shield for aggressive plays.
Building the Right Skill Combination
You can equip one active skill and three passive ones. Success in matches depends heavily on synergy. For instance, combining Alok’s active ability with passive skills from Kelly (speed boost), Hayato (armor penetration), and Jota (HP recovery) makes for a balanced, mobile fighter.
Recommended Skill Builds
-
Rushers: Alok + Kelly + Jota + Hayato
-
Snipers: Laura + Rafael + Dasha + Moco
-
Support: Dimitri + Olivia + Kapella + Thiva
Choosing your skill combination early on prepares you for specific roles in your team or solo play.
How to Land Safely and Smartly
Choosing Drop Locations Wisely
In Free Fire, the landing spot sets the pace of your match. Popular zones like Pochinok and Clock Tower are filled with loot but also enemies. Safer areas such as Cape Town or Rim Nam Village offer slower starts with decent loot.
Early Game Loot and Positioning
Always aim for at least a level 2 vest and helmet before engaging. Prioritize grabbing a gun, medkits, and armor first. Using a scanner or UAV (if available) can help spot enemies early and avoid unwanted fights.
Tips for Early Survival
-
Don’t land directly in the center of the zone.
-
Keep moving while looting to avoid snipers.
-
Engage only when you have armor and a decent weapon.
Your early game is all about preparation — the better your start, the more options you have later.

How to Loot Efficiently Without Wasting Time
Learn Loot Priority
You can’t carry everything, so efficient looting is crucial. Always focus on:
-
Weapons: One close-range (SMG/Shotgun), one long-range (AR/Sniper)
-
Armor: Vest and helmet upgrades
-
Utilities: Gloo walls, grenades, medkits
Backpack Management
Avoid cluttering your backpack. Too many attachments or grenades may cost you a crucial medkit slot. Use your limited space smartly by balancing offensive and defensive tools.
Looting Checklist
-
At least 3 medkits
-
2–3 gloo walls
-
1 frag and 1 flash grenade
-
100+ bullets for primary weapon
Proper looting not only saves time but also boosts your readiness for mid-game battles.
How to Win Mid-Game Fights and Third-Party Battles
Smart Engagement Tactics
Mid-game is where most players get eliminated. Avoid open-field fights unless you have cover or elevation advantage. Use gloo walls, trees, or houses as shields during combat.
Dealing with Third Parties
When two players are fighting, a third player often enters for an easy kill. Either avoid ongoing battles or wait until both players are weak before entering the fight.
Combat Do’s and Don’ts
-
Do use sound to track footsteps and gunfire.
-
Don’t reload in open fields.
-
Do peek-shoot behind cover.
-
Don’t chase fleeing enemies blindly.
Positioning and patience win more fights than pure aggression.
How to Master Weapons and Recoil Control
Understanding Gun Types
Each weapon class serves a unique purpose:
-
SMGs: Close combat (MP40, Vector)
-
ARs: Versatility and range (SCAR, AK, M4A1)
-
Snipers: Long-distance (AWM, Kar98k)
-
Shotguns: One-shot potential (M1887, MAG-7)
Recoil and Attachments
Recoil management is essential, especially for ARs. Use attachments like foregrips, muzzles, and scopes to reduce recoil and increase stability.
Weapon Combos to Try
-
Aggressive: M1887 + MP40
-
Balanced: M4A1 + Desert Eagle
-
Sniper: AWM + UMP
Practice in Training Mode regularly to build muscle memory for weapon handling.
How to Use Gloo Walls Like a Pro
Defensive Gloo Wall Techniques
Gloo walls are not just shields — they are game-changers. When shot at, immediately drop a gloo wall in front of you. For healing, build a “corner wall” by placing two walls in an L-shape.
Offensive Gloo Wall Tactics
Use gloo walls to trap enemies or create temporary cover during a push. In close-range fights, “360 gloo wall” techniques can save your life.
Pro Gloo Wall Tips
-
Always carry 3–5 gloo walls.
-
Customize placement button for speed.
-
Fake retreat, then wall-trap enemies.
Mastering gloo walls separates the average players from the elite.
How to Rotate and Use the Safe Zone Effectively
Early and Mid-Zone Rotation
Plan your movement early. Avoid chasing the safe zone last minute, as the shrinking area forces predictable paths that enemies may ambush. Use vehicles or zip lines when far from the zone.
Late Game Positioning
High ground is king. Always aim to reach an elevated or walled position before the final circles. Avoid staying in buildings unless you can trap entrances with grenades or gloo walls.
Zone Rotation Strategy
-
Rotate diagonally, not straight to the center.
-
Monitor kill feed and UAVs to detect nearby enemies.
-
Carry inhalers and mushrooms to reduce zone damage impact.
Good rotations minimize risk and increase your control of the battlefield.
How to Survive the Final Circle
Stay Calm and Read the Situation
The final circle is intense. Don’t panic. Watch the minimap, listen for enemy footsteps, and only engage when you’re sure of the kill.
Last Zone Survival Techniques
Use gloo walls and prone tactics to stay hidden. If you have grenades, use them to flush out enemies behind cover. Also, pay attention to zone movement — it favors those who move first.
Final Circle Checklist
-
3+ gloo walls
-
Medkits/Inhalers
-
Grenades
-
Full Armor
Surviving the final zone requires perfect resource management and nerves of steel.
How to Play With a Squad Effectively
Roles and Communication
Assign roles: one sniper, one rusher, one medic, and one support. Use in-game voice chat or third-party apps like Discord for coordination.
Reviving and Repositioning
Don’t rush to revive in open spaces. Use gloo walls or pull your teammate behind cover first. Always reposition after every kill to avoid counter-attacks.
Squad Synergy Tips
-
Stick together, but not too close.
-
Share loot and gloo walls.
-
Rotate together; never leave one player behind.
A well-coordinated squad can dominate any lobby regardless of individual skill.
How to Train and Improve Daily
Use Training Grounds
Free Fire’s Training Grounds offer areas to practice shooting, gloo wall placement, and movement. Spend at least 10–15 minutes daily in the training area.
Learn from Others
Watch pro players on YouTube or Twitch. Analyze how they rotate, their gloo wall speed, and how they handle pressure.
Daily Practice Goals
-
20 kills in Training Grounds
-
10 headshots with ARs
-
3 gloo wall placements in under 5 seconds
Consistent training builds confidence, sharpens reflexes, and elevates your gameplay.
Conclusion
Free Fire is a game that rewards both fast reactions and deep strategy. From your landing zone to your final headshot, every decision matters. This guide has shown you how to master each stage of the match — by choosing the right character build, managing loot smartly, controlling weapons, using gloo walls effectively, and dominating the final circle.
The difference between an average player and a great one is preparation, knowledge, and execution. Use this structured approach to level up your gameplay and become a feared name in every lobby.